Introduction
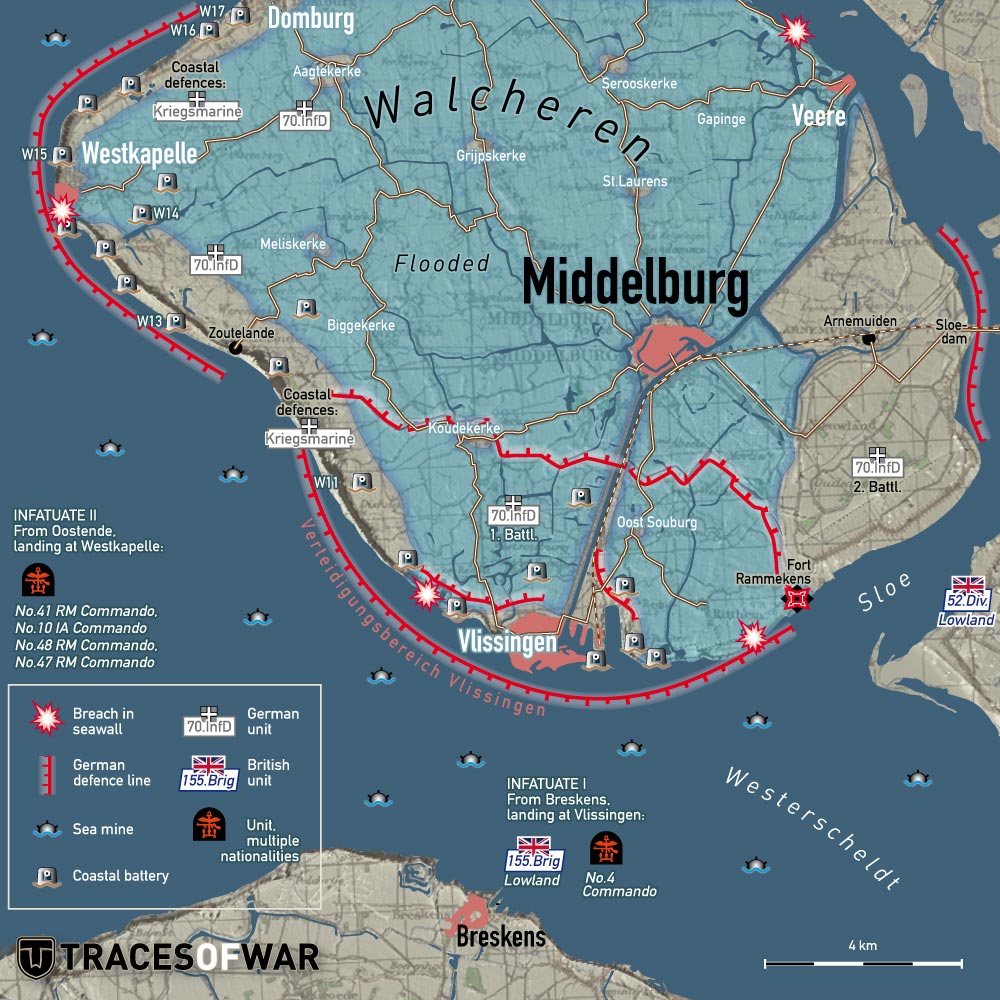
Operation Infatuate was the final stage of the battle of the Scheldt. In addition to a land operation via Zuid-Beveland and the Sloedam, in Operation Infatuate I and II amphibious landings were undertaken near Flushing and Westkapelle respectively. The latter was carried out by an armada of no less than 123 vessels.
The Assault Forces
The plans for Operation Infatuate, as approved by SHAEF on October 1, 1944, entailed the full deployment of 4th Special Service Brigade (SSB). H-hour for Infatuate II near Westkapelle was set at 09:45[1]. The primary order read: landing at Westkapelle, establishing and securing a bridgehead, advancing along the coast in the direction of Flushing in order to knock out the coastal batteries between Westkapelle and Flushing. Next, the troops were to move northwards along the coast towards Vrouwenpolder to clear the coastal defenses there[2]. Air support was to be provided by No. 84 Group RAF.
On October 27, 1944, in the Belgian port of Ostend, T-Force of the Royal Navy was assembled. This force was the base of the troops destined for the landing near Westkapelle. A total of 123 vessels was to put the men of 4th SSB ashore and support them[3]. The British warship HMS Warspite 03 and the monitors HMS Erebus (I02) and HMS Roberts (F40) made up the nucleus of this fleet. They were tasked with knocking out the German coastal batteries which hadn't been destroyed yet by the aerial bombings.
4th SSB would carry out the land operation near Westkapelle. On September 27, 1944, the unit had assembled in De Haan in Belgium. Prior to the launch of the operation, 4th SSB consisted of No. 41, 47 and 48 Royal Marines Commando, No. 4 Commando and units of No. 10 Inter-Allied Commando 4th SSB[4]. Of these, Nos. 41, 47, and 48 were tasked with the landing near Westkapelle. No. 4 Commando was tasked with the landing near Flushing and No. 10 was split up and tasked with both operations. HQ 4th SSB was assigned to HQ No. 10, section of No. 3 X Troop and No. 2 Dutch Troop. Nos. 1 and 8 French Troop, together with a section of No. 2 Dutch Troop were assigned to No. 4 Commando for the attack on Flushing. For the attack on Westkapelle, No. 41 Commando was reinforced with No. 4 Belgian and No. 5 Norwegian Troop[5].
Of No. 10 Inter-Allied Commando, a detachment of No. 2 Dutch Troop was assigned to No. 47 Commando for the attack on Westkapelle. No. 2 Troop consisted of Captain J. Linzel, Sergeant-major J.G. van den Bergh, sergeants I.J.E. van Dullemen en G.P. Ubels, corporals A.M.T. Italiaander, W. Knijff, V.G Kokhuis, H. Cramer, B.S. Boelema, P.A. Visser, J.A. van der Linde and A. Bloemink[6].
No. 41 Royal Marine Commando was ordered to capture Westkapelle itself and subsequently advance northwards towards Domburg. No. 48 RMC was to focus just south of No. 41 RMC on capturing a radar station and German naval artillery. No. 47 RMC was to advance on Zoutelande and Flushing[7].
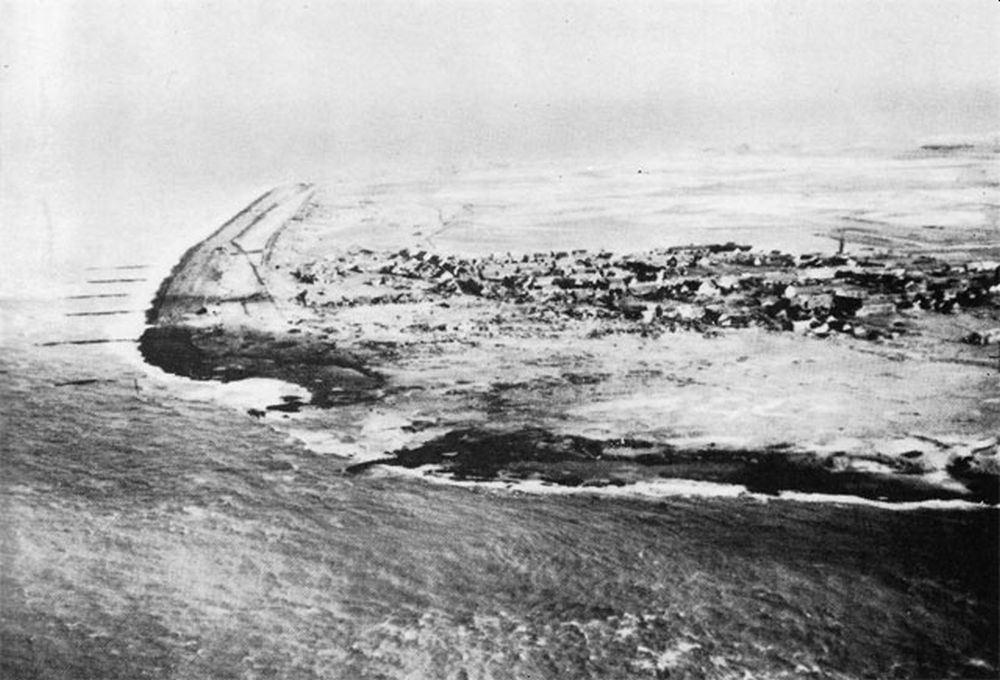
In preparation for the invasion of Walcheren, dykes were bombed in an attempt to inundate the major part of Walcheren. The main objective of this was to disable a large part of the German defenses. Of course, it had no effect on the fortifications located in and on the dunes. On October 3, the first breach in the dyke at Westkapelle was made. On October 7, the inundation was expanded with a bombardment on the dykes at De Nolle and the Sloe near Flushing. On October 11, another breach was made at Veere[8]. On October 17, an additional bombing was carried out near Westkapelle and the breach was almost doubled in width. This was to become the stage of the battle of Westkapelle.
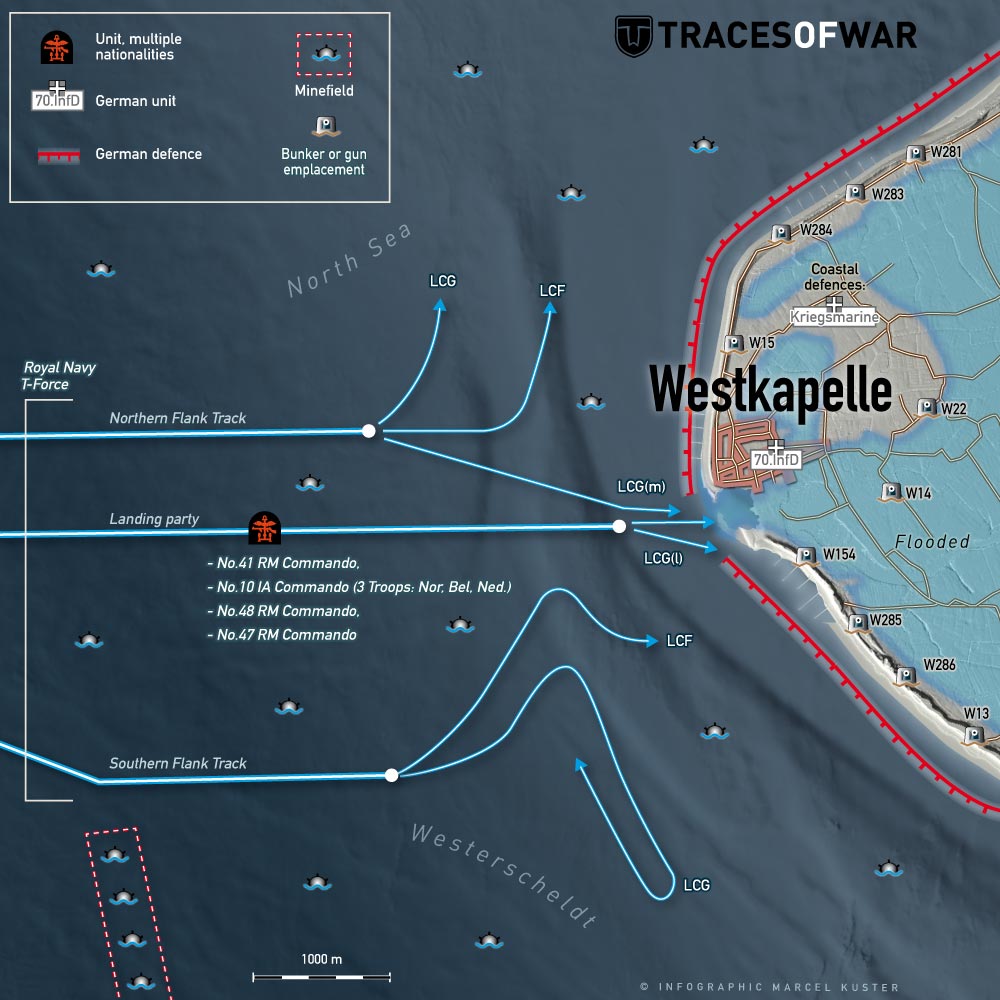
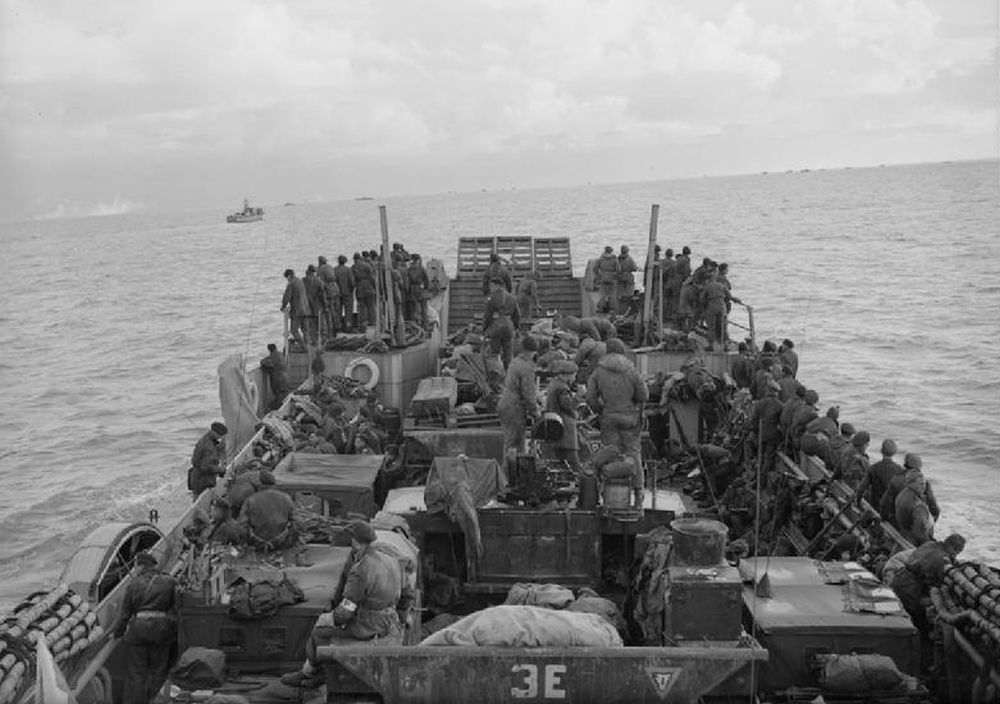
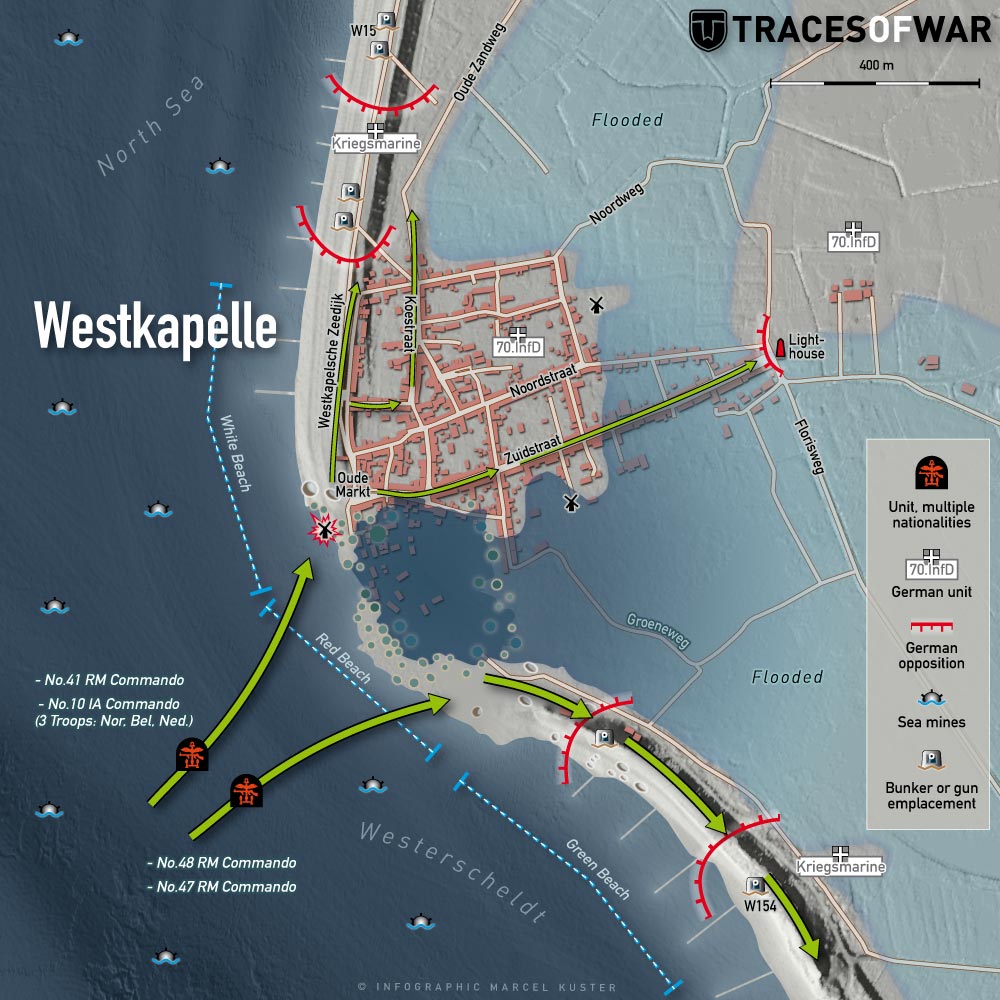
On October 31, the armada set sail towards Westkapelle. The landing site was split up in three parts. Red Beach was located to the north of the breach near Westkapelle. The terrain consisted of a 720 yards wide ramp and was heavily defended with all sorts of obstacles. The breach itself was named White Beach, 340 yards wide. It was only accessible along the edges, it had been heavily bombed and was full of craters and debris. South of the areas, Green Beach was located; a sandy beach some 400 yards wide with dunes[9].
The original plan read that the three vessels of Bombardment Squadron, commanded by Captain Marcel Kelsey[10], HMS Warspite (03), HMS Erebus (I02) and HMS Roberts (F40) would launch a preliminary bombardment on the gun emplacements W 15 and W 13. Subsequently they would shift their fire to W 11 and W 17[11]. Support Squadron Eastern Flank (SSEF), commanded by Captain Kenneth Sellar[12], would then shell the emplacements near the assault beaches. To this end they would split into two groups, one on each side of the beaches. The northern flank consisted of:
- Landing Craft Flak or LCF 36, 38 and 42
- Landing Craft Gun Large or LCG(L) 1, 2 and 17
- Landing Craft Gun Medium or LCG(M) 101
- Landing Craft Headquarters LCH 98
- Landing Craft Support Large of LCS(L) 254, 259 and 260
- Landing Craft Tank, Rocket or LCT(R) 331, 378 and 457 [13]
The southern flank consisted of:
- LCF 32, 35 and 37
- LCG(L) 9, 10 and 11
- LCG(M) 102
- LCH 269
- LCS(L) 252, 256 and 258
- LCT(R) 334 and 363 [14]
The LCG(L)s were to concentrate on W 15 and 13 while the LCFs and the LCT(R) were to take on the smaller defensive positions around the beaches. The LCG(M)s were to beach on both sides of the landing area to fire on the fortifications at close range, supported by the smaller and more maneuverable LCG(L)s. Supported by this firepower, B, P and S Troop of No. 41 RM Commando[15] were to go ashore on Red Beach on the right flank from three LCI(S), supported on the left flank by AVREs and flail tanks[16] of 30th Armored Brigade, 79th Armored Division from four LCTs. Five minutes later a second wave was to land on the left flank from two LCTs carrying A Troop, HQ and X Troop of No. 41 RM Commando and on the right flank three LCTs carrying B Troop, X Troop, en Y Troop of No. 48 (Royal Marine) Commando[17]. After 25 minutes, as soon as the landing beach was consolidated, three LCTs carrying Y Troop of No. 41 RM Commando and the additional men of No. 10 Inter-Allied Commando would land on the left flank A and Z Troop of No. 48 RM Commando would land in two LCTs[18]. From 60 minutes after H-hour, the other units of the 4th Special Service Brigade and No. 47 RM Commando would land in two and four LCTs respectively[19]. No. 48 Commando was to land on the southern side of White Beach, capture the radar station there and advance on W 13. Nex they were to strike in the direction of Zoutelande. No. 47 Commando would remain in reserve, push through the lines of No. 48 Commando towards Dishoek and make contact at Nolledijk with No. 4 Commando which had landed near Flushing[20]. Subsequently, No. 41 RM Commando would strike north towards Domburg and Vrouwenpolder.
Definitielijst
- Brigade
- Consisted mostly of two or more regiments. Could operate independently or as part of a division. Sometimes they were part of a corps instead of a division. In theory a brigade consisted of 5,000 to 7,000 men.
- Flak
- Flieger-/Flugabwehrkanone. German anti-aircraft guns.
- inundation
- “Latin: No bottom”. The deliberate flooding of land with the aim of stopping or hindering the advance of the enemy into a certain area.
- invasion
- Armed incursion.
- radar
- English abbreviation meaning: Radio Detection And Ranging. System to detect the presence, distance, speed and direction of an object, such as ships and airplanes, using electromagnetic waves.
- RAF
- Royal Air Force. British air force
- Rocket
- A projectile propelled by a rearward facing series of explosions.
- SHAEF
- Supreme Headquarters Allied Expeditionary Force, the Allied High Command in Western-Europe after the Normandy landings.
- Squadron
- A military unit in the Belgian navy usually six to eight small ships operating together under one command. The smallest military unit in the Dutch air force of about 350 men. In most countries is the designation of a military unit thesize of a company. It is either an independent unit, such as a battery, or part of a bigger Calvary unit. In the air force it is the designation of a unit of aircrafts.
Defense
At Westkapelle, the Allies faced Marine-Artillerie-Abteilung 202 and Grenadier-Regiment 1020[21]. Walcheren had been converted into a fortress with Verteidigungsbereich Vlissingen its nucleus, surrounded by an anti-tank defensive lime. The troops deployed near Westkapelle mainly faced a range of fortified support centers with gun emplacements, radar stations and such. By inundating Walcheren a large part of the defenses had been rendered useless and they would face the Verteidigungsbereich itself only at the end of their advance.
Grenadier-Regiment 1020, commanded by Oberstleutnant W. Veigele, consisted of I Battalion, commanded by Major Müller and II Battalion of Hauptmann Schicke and was responsible for the territorial defense of northwestern Walcheren with its headquarters in Oostkapelle[22].
Along the coast, strong gun emplacements were located manned by Marine-Artillerie-Abteilung commanded by Korvettenkapitän R. Opalka who had his Gefechtsstand (I/2020 HQ) in Domburg[23].
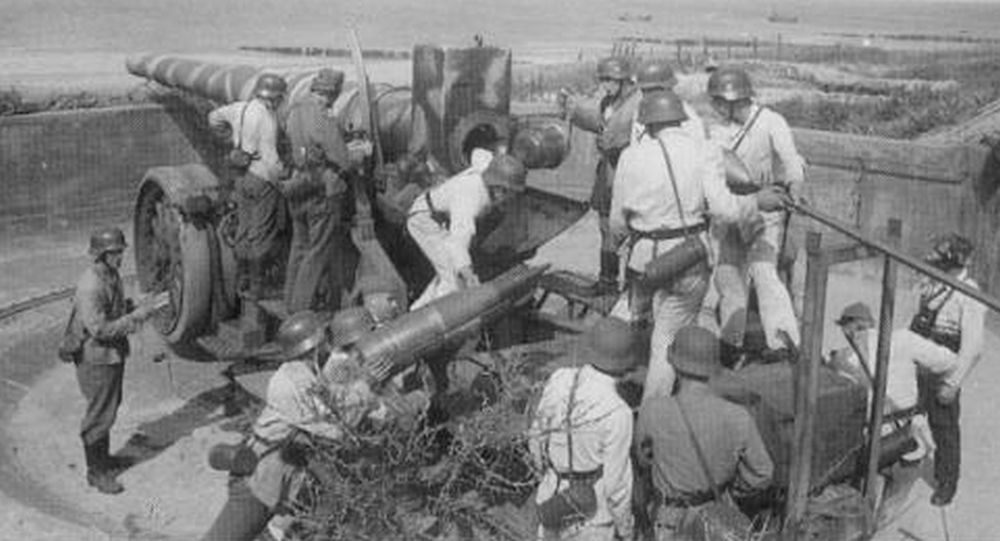
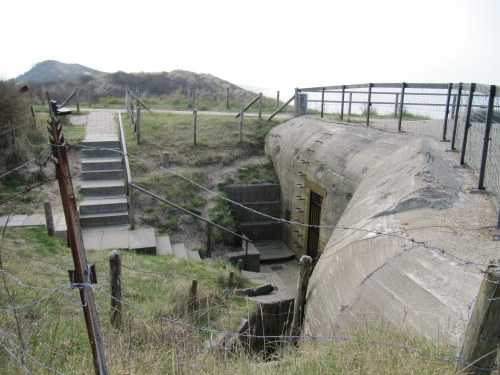
Close to the landing site in Westkapelle, Marineküstenbatterie Westkapelle (6/202) was located[24] with W 15. This was armed with four former British 3.7 inch guns and two former British 3 inch guns. Moreover, the fortifications W 154 and 285 were located near the landing area and further inland, in the inundated area, W 14 and 22 were located near Westkapelle.
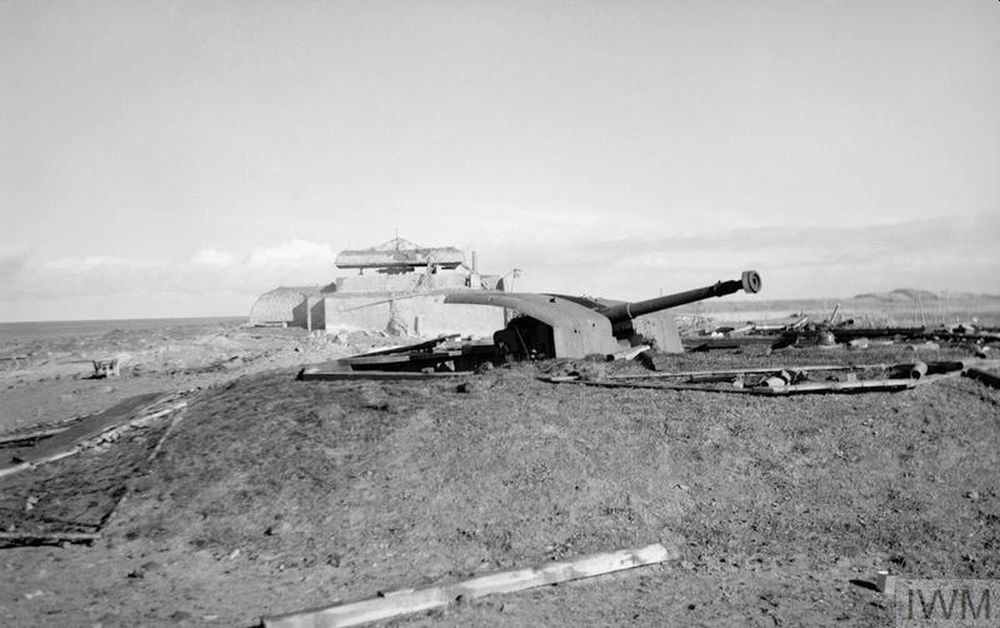
The open gun emplacement at W 15. The other guns were located in sheltered emplacements. Source: Imperial War Museum BU 1273
W 13 or Marineküstenbatterie Zoutelande (7/202)[25] was located a little south of the landing area. It was armed with four 15cm, two 7.5cm guns and three 20mm quadruple Flak guns and further away fortification W 288 on the coast and the gun emplacement W 12 were located further inland.
Marineküstenbatterie Dishoek (8/202)[26] - also known as W 11 - was located on the road to Flushing and was armed with four 15cm guns. In the end, the commandoes from Westkapelle would have to make contact with the troops near Flushing near the breach in Nolledijk. W 4, the Gefechtsstand of Marine-Flak-Abteilung 810 (I/810)[27], commanded by Korvettenkapitän H. Köll and W 3, Marineflakbatterie West were located here[28]
In the north, the Allies would first encounter fortification W 5 and subsequently gun emplacement W 17, Marineküstenbatterie Domburg (5/202) 29[29] with four 22cm guns and a 5cm piece. In Domburg itself, W 37 was located armed with a former British 5.9 inch gun.
Finally, far to the north, fortification W 18 and Marineküstenbatterie Oostkapelle (4/202)[30] were located. The latter - also known as W 19 - was armed with five former British 3.7 inch guns.
There were more troops on Walcheren but they had been assembled elsewhere on the island and they would play a role in Operation Infatuate I, the landing near Flushing and Operation Mallard, the attack across the Sloedam. These were the remaining elements of Marine-Flak-Abteilung 810, another battery of Marine-Artillerie-Abteilung 202, the rest of the 70. Infanterie-Division, the Grenadier-Regiment 1019, Artillerie-Regiment 170, Divisions-Füsilier-Batallion 170, Pionier-Batallion 170 and the Festung-Stamm-Truppen LXXXIX[31]
Definitielijst
- Abteilung
- Usually part of a Regiment and consisting of several companies. The smallest unit that could operate independently and maintain itself. In theory an Abteilung comprised 500-1,000 men.
- Batallion
- Part of a regiment composed of several companies. In theory a batallion consists of 500-1,000 men.
- Flak
- Flieger-/Flugabwehrkanone. German anti-aircraft guns.
- radar
- English abbreviation meaning: Radio Detection And Ranging. System to detect the presence, distance, speed and direction of an object, such as ships and airplanes, using electromagnetic waves.
- Regiment
- Part of a division. A division divided into a number of regiments. In the army traditionally the name of the major organised unit of one type of weapon.
Attacks by Support Squadron Eastern Flank
Due to the approach over sea and the mouth of the Scheldt, it was imperative to use larger landing craft at Westkapelle, in contrast to Flushing. In the early hours of November 1, 1944, T-Force had set sail from Terneuzen. Landing Craft Tanks or LCTs were the major element of the fleet. They carried special tanks to support the landing troops and LVT Buffaloes and M29 Weasel vehicles carrying the commando troops. Support Squadron Eastern Flank (SSEF) was present to support the landing. The squadron consisted of five LCT(R)s, six LCG (L)s and two LCG (M)s[32]. The SSEF numbered a total of 27 vessels.
Three hours later than the landing at Flushing, the landing at Westkapelle was kicked off at 07:30 after Captain Pugsley had radioed the code word Nelson[33]. Owing to bad weather in England, air support at the landing themselves was impossible. Captain Anthony Pugsley and the commander of Force-T, Brigadier Bernhard Leicester aboard command vessel HMS Kingsmill (K484) had hoped for better[34]
The landing started when two motor vessels left the fleet and took up positions near sand banks off the coast. At 08:09, the German artillery of W 15[35] north of Westkapelle opened fire on the vessels. In response, HMS Warspite (03) opened fire on the coastal batteries near Domburg and HMS Erebus (I02) did likewise on those at Westkapelle itself[36]. The guns of Erebus jammed however and she could deliver fire support only later when the landing was already in full progress. HMS Roberts (F40) was ordered to take over her position temporarily. She managed to place direct hits on W 15, knocking out two 94mm pieces and thirty German soldiers[37]. Soon after the artillery of W 15 had opened up, the artillery of W 13 south of Westkapelle joined in[38].
Due to the heavy German defensive fire, Captain Kenneth Sellar decided to split up the Support Squadron in a northern group[39] and a southern group[40]. From some 6.2 miles out, the fast approaching LCG (L)s could go into action. Distances were so great however that their fire lacked precision. German defensive fire claimed its first victim at around 09:20 when LCG (L) 37 was hit, sailing 2 miles off shore[41]. The vessel could continue nonetheless.
The three LCG(L)s of Support Squadron Northern Group led their group towards the coast. The LCT(R)s took position some 2.5 miles off the coast. LCT(R) 457 and 378 fired much too short and missed their targets. LCG(L) 2 was hit by friendly fire but remained in action. LCF 42 was hit by rockets from friendly vessels as well, losing 33 crew members but she could keep on fighting. LCT (L) 254 did hit its target. When the supporting vessels turned away after their attack, they came under fire from W 15. The four 94mm guns located their targets and LCG(L) 1 was their first victim. Struck by two shells, Lieutenant Alfred Ballard steered his vessel towards the coast where it ran aground however and fell victim to the German fire. Her survivors were taken off by LCS(L) 254; LCG)L) 1 exploded shortly afterwards[42]. LCG(L) 2 managed to reach the coast as well in such a way that it was invulnerable to the guns of W 15. Two 88mm guns deployed along the coast could fire at the vessel however and claimed many victims. One of the few of some higher ranking people who was still alive, Petty Officer Arthur Harris managed to escape to sea with LCG(L) 2. Meanwhile, LCG(L) 17 attempted to divert the fire from W 15 by zigzagging in front of the guns. In the end, this vessel had to be pulled back as well because of the many victims, also because she had depleted almost all of her ammunition. The larger armed vessels were closely followed by three LCS(L)s.
The commander of the three support vessels, Lieutenant Edward Howell, had his ships zigzag off the coast but their guns were actually too light for a fight against W 15. LCS(L) 260 was the first to be hit[43] and grounded. LCS(L) 259 commanded by Lieutenant Eric Tiplady, had his vessel come alongside and together they managed to escape[44]. The third LCS(L), 254, commanded by Sublieutenant George Kirk, succeeded in getting to the coast as well where it managed to lend support to LCG(L) 1 as indicated.
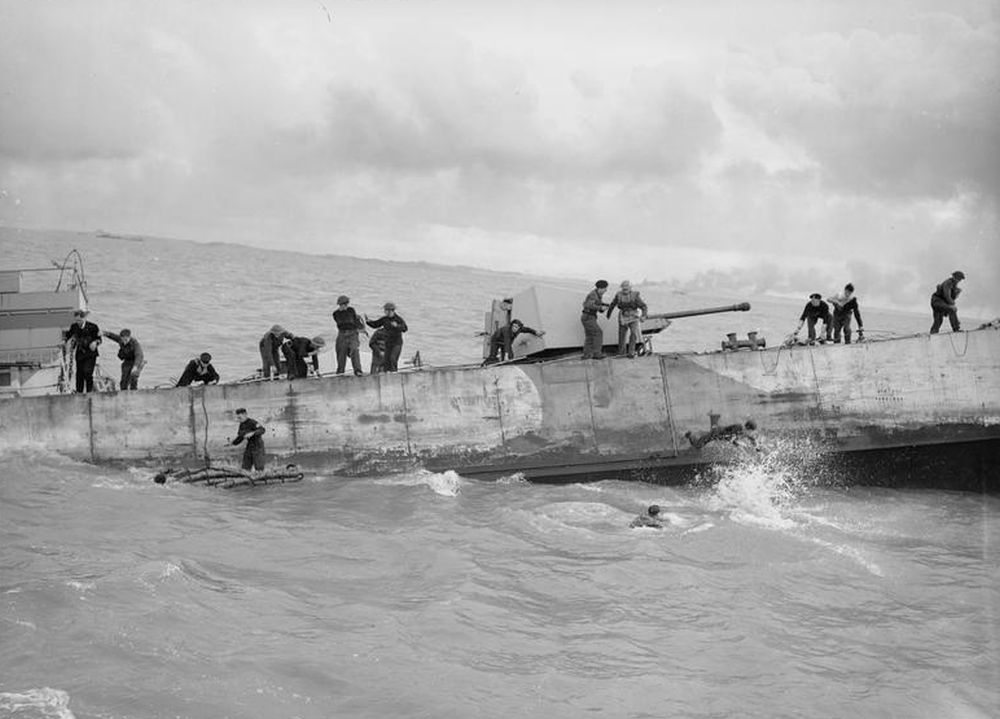
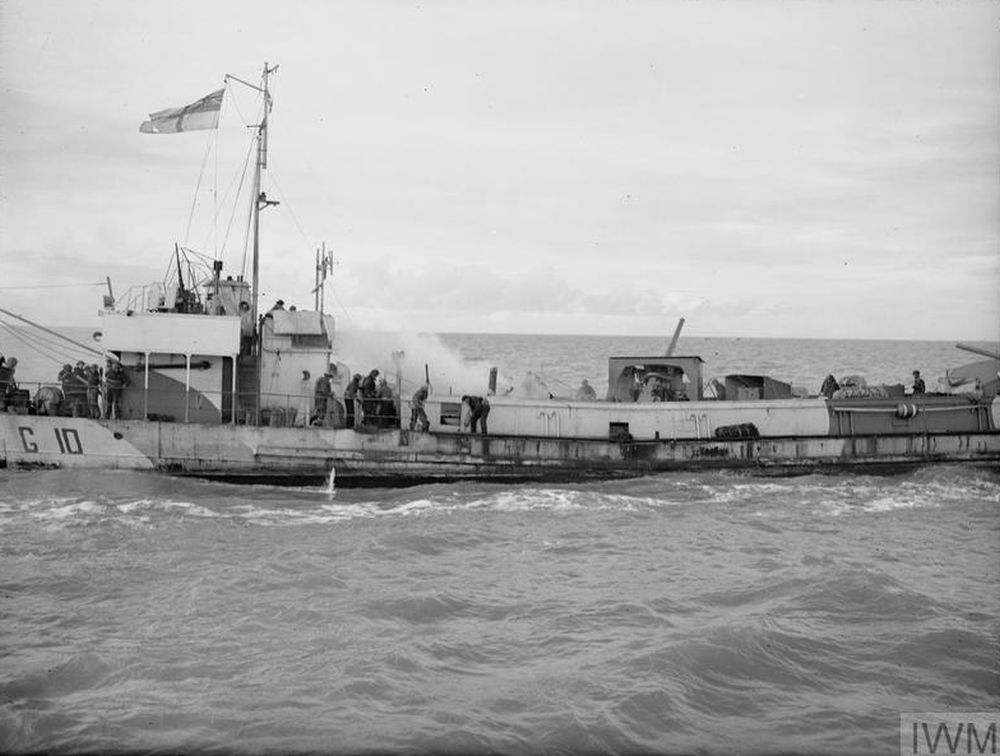
In addition to the vessels already mentioned, LCG(M)s were deployed of which LCG(M) 10 managed to get to the coast. At 09:45 the vessel was beached closed to its target and it laid heavy fire on her target[45]. After a while, both guns were knocked out and Lieutenant George Flamank decided to pull his ship out. In this he failed because his vessel was mortally hit by fire from W 15 and she started to go down fast. Ships coming to her assistance managed to pull crewmembers from the water.
The last attempt to knock out as much of the defense as possible before the commandoes went ashore, was made by the LCFs. Although they could inflict only minor damage, they did force the German troops to take cover and possible give the commandoes more of a chance to get ashore. LCF 42 commanded by Lieutenant Keep[46] was damaged by friendly fire but was able to continue operations nonetheless. LCF 38 commanded by Lieutenant Alfred Wiks[47] was seriously damaged but kept firing until she was totally destroyed. Her survivors were picked up by LCF 36
Support Squadron - Southern Group had LCT (R) launch her rockets first at 2.5 miles off the coast. LCT (R) 363, commanded by Lieutenant Keir Rasmussen[48] laid fire on a radar post but was hit herself by fire from W 13. Although fire broke out, the crew managed to save the vessel. LCT (R) 334 commanded by Lieutenant Ernest Howard[49] was hit by fire from W 13 as well before she could launch her rockets. This caused many of her rockets to be launched spontaneously. Although on fire, the crew managed to launch the remaining rockets and sail away. On the way back, LCT (R) 334 took the damaged but still floating 363 in tow to Ostend[50]
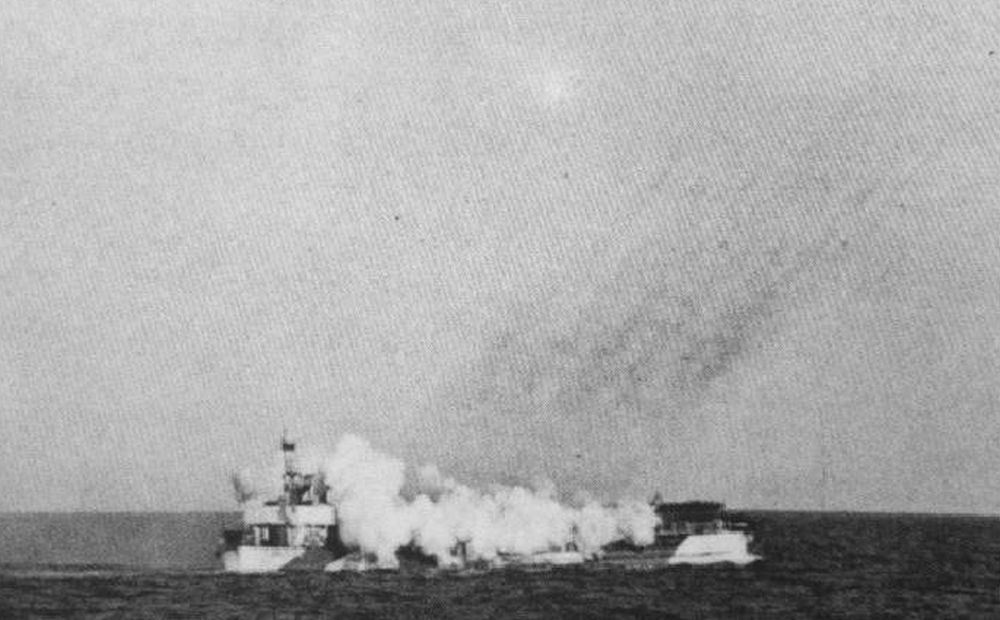
The next vessels of the southern group that swung into action were the LCG(L)s commanded by Lieutenant David Crealock[51]. They fired at a position just south of the breach to knock out the gun emplacements there. LCG 10 of Lieutenant Clifford Holbrook[52] was the first to be struck by W 13 but continued firing. This was a formidable opponent with its six 15cm guns. LCG(L) 11[53] was hit twice and her commander, Lieutenant Thomas Foggitt was forced to give up the fight. His second officer took command and managed to reach the shore. LCG(L) 9, commanded by Lieutenant George Ring[54] meanwhile had his ship lay a smoke screen in order to hide the vessels from view of W 13. Strangely enough he had a little success.
The next group that went into action consisted of three LCS(L)s which escorted LCG(M) 102[55]. The target of this vessel was battery W 266 which could cover White Beach. LCS(L) 252 was the first to be hit by W 13 and blew up. Almost immediately afterwards LCS(L) 256 was hit and caught fire. LCS(L) 258 rushed to her assistance but was destroyed as well. LCG(M) 102 became W 13's next target[56]. Despite being hit, her commander Lieutenant Donald Flory held his course towards W 266 and kept firing at it. Her action caused so much distraction among the Germans in W 226 and W 13 that it enabled the commandoes to go ashore. While No. 48 RM Commando hit the beach, the unfortunate LCG(M) 102 exploded[57]
The fighting of Support Squadron Eastern Flank had been heavy. Nine vessels, LCF 37, LCF 38, LCG(L) 1, LCG(L) 2, LCG(M)101, LCG(M) 102, LCS(L) 252, LCS(L) 256 and LCS(L) 258 had been destroyed; eight were damaged to such an extent that they were put out of action and three other vessels were more or less slightly damaged[58]. In the end, only 10 out of the 27 vessels were still serviceable.
Definitielijst
- commando troops
- Special forces, deployed especially for missions behind enemy lines such as sabotage and reconnaissance.
- radar
- English abbreviation meaning: Radio Detection And Ranging. System to detect the presence, distance, speed and direction of an object, such as ships and airplanes, using electromagnetic waves.
- Squadron
- A military unit in the Belgian navy usually six to eight small ships operating together under one command. The smallest military unit in the Dutch air force of about 350 men. In most countries is the designation of a military unit thesize of a company. It is either an independent unit, such as a battery, or part of a bigger Calvary unit. In the air force it is the designation of a unit of aircrafts.
The commandoes in action
The first wave of commandoes landed on Red Beach between 13 and 27 minutes too late[59]. The fear that the landing group would be decimated by the Germans, like they had done to the support group, proved unfounded. W 13 had completely run out of shells and W 15 saw its supply diminish seriously as well. No. 41 RM Commando was able to get ashore without too much resistance[60]. Meanwhile, air support had been arranged and Hawker Typhoons and Supermarine Spitfires of No. 84 Group joined the fight[61]. B Troop took position on the dyke from where they could lend fire support to other landing groups. P Troop struck in the direction of W 15, which had not yet been knocked out though and an LCT named Damson was hit to such an extent, she had to return to sea. She carried some AVREs and Crab tanks. LCT Cherry was hit by W 15 and had to pull out as well. Regarding the dire situation on Red Beach, it was decided to direct the remaining LCTs to White Beach, out of range of W 15. Meanwhile, a second wave of No. 41 RM Commando entered the breach. They dropped A and X Troop south of the breach after which the troops crossed it in their Buffaloes to their operational area[62]. The western side of Westkapelle was captured quickly and P Troop advanced into the northern part of the town. They were able to capture it without too much resistance.
The next unit to come ashore on White Beach was No. 10 (Inter-Allied) Commando[63]. Despite fierce resistance and LCTs beaching too early, they managed to get ashore. Subsequently the two units moved into Westkapelle. Meanwhile, No. 48 RM Commando began coming ashore on White Beach. The first target was radar station W 154[64]. B Troop, which had come ashore on the south side, discovered the bunkers were empty. X Troop moved past B in the direct of the station itself. Despite slight resistance, they managed to defeat the German defense quickly. Next, W 285 and 286 were captured and the dunes south of White Beach were secured[65]. The next landing wave remained under heavy German fire though. Various LCTs were hit and although most of the men succeeded in getting ashore, much material was lost in the waves.
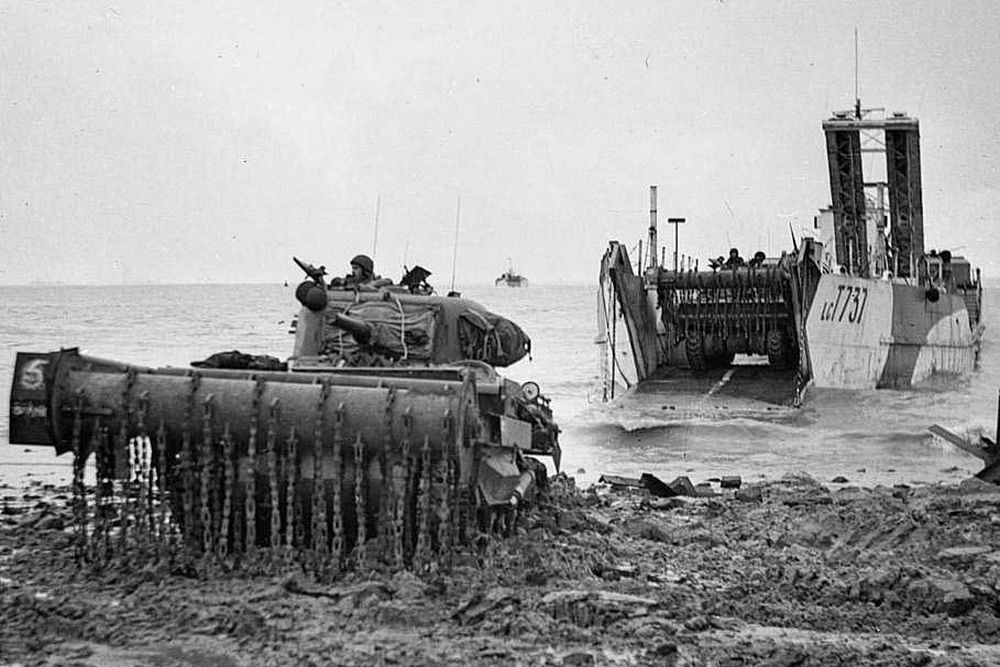
LCT Bramble managed to unload a Sherman flail tank which immediately bogged down in the mud however. A bridge laying AVRE managed to lay its bridge but got stuck in the mud as well. No less than four flail tanks from LCT Apple got stuck as well. Subsequently, an AVRE laid its bridge right at the end of the boarding ramp of the LCT but got stuck as soon as it had crossed it. LCT Cherry did manage to unload her flail tanks except the one that had been damaged already. Only when the first commandoes had reached the easternmost part of Westkapelle did a Crab flail tank finally manage to cross the dyke. Others soon followed.
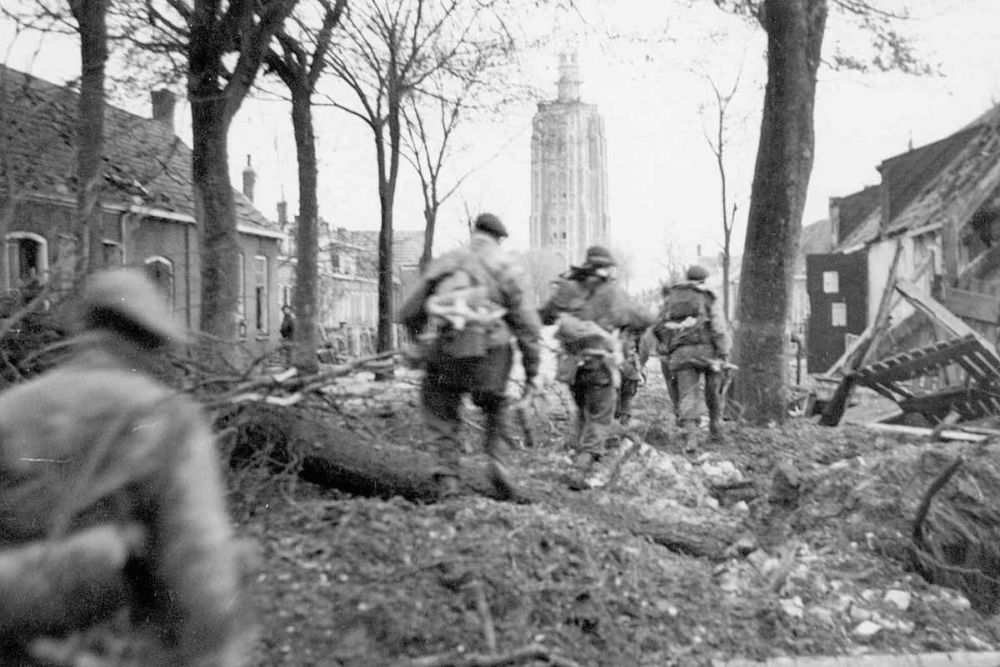
No. 41 (Royal Marine) Commandoes A Troop approaching the light tower in Westkapelle. Source: Imperial War Museum
Meanwhile, A Troop of No. 41 RM Commando approached the light tower at the end of the Zuidstraat through Westkapelle and was subjected to fire from the tower[66]. Sergeant Ferguson had reached the commandoes in his flail tank and fired a few shells at the tower[67]. Next the door was blown and after a short talk they succeeded in persuading the Germans to surrender. The commander of No. 41 Commando, Lieutenant colonel Eric Palmer sent X Troop in the direction of the batteries W 14 and 22 further inland[68]. The men soon returned and reported that sea water had rendered these bunkers inoperable. Around 11:15, Palmer was able to report that Westkapelle itself had been secured[69]. No, 41 Commando prepared the village for defense and the first bulldozers could get to work clearing the roads. The various tanks that had managed to get ashore, were deployed in and around the village in such a way as to be able to give fire support to future actions by the commandoes[70].
Meanwhile, W 15, Marineküstenbatterie Westkapelle, manned by Kriegsmarine Batterie 6/202 hadn't been captured yet and was firing continuously. At that moment, No. 47 RM Commando began to come ashore. Two LCTs were hit by shells in the process. One of them caught fire because the Weasel flamethrower had been damaged by an explosion. In the end, many troops managed to come ashore but again, much material had been damaged. W 15, although it had been hit, managed to continue firing at the attackers with one of the 94mm guns located in its concrete shelter and both 76mm guns in their open emplacement[71].
At 12:05, HQ with Brigadier Bernard Leicester went ashore and settled down in the captured radar post Würzburg-Riese Seetakt[72]. In order to prevent much more material from getting damaged it was decided to shift the delivery of supplies via Green Beach more to the south. With the intention to force a breakthrough near W 15, P Troop was reinforced with Norwegian men of No. 10 (Inter-Allied) Commando. Y Troop took position at the back of W 15. At 12:00, a joint attack was launched[73]. The German crew wasn't looking forward to a fight against such a supremacy and surrendered quickly.
The only resistance in the direction of Westkapelle and the landing area came from Batterie W 17 near Domburg in the north[74]. The landing in this area was consolidated and preparations could be made for the next stage, the advance on Domburg and Vrouwenpolder.
Meanwhile, No. 48 RM Commando prepared itself for the capture of W 13. Although its artillery was useless because of a lack of ammunition, the fire director bunker could still direct other batteries such as W 17[75]. Around 13:00 Y Troop reached the outer defensive perimeter of the battery. Land mines and machinegun fire from entrenched Germans caused many victims. Hastily requested fire support from HMS Roberts ended in disaster as her fire lay too short, hitting our troops. Bombardment Squadron Observant Captain Arthur Davis, his radio operator and the doctor of No. 4 Commando, Lieutenant David Winser were killed[76]. A request for fire support from Zeeuws Vlaanderen took a while. During this lull in the fighting the commander of X Troop, Captain Roderick Mackenzie was hit in the head by a sniper. He passed away several days later. Finally, word was received that fire support from Zeeuws Vlaanderen was forthcoming. Z Troop took up positions to launch the attack. At that moment a German mortar bomb came down, killing Lieutenant Cyril Lindrae and injuring Captain Tom Nuttall and Lieutenant John Square. Captain Nuttall managed to reach B Troop and ask Captain Edwin T. Dunn to take charge. B. Troop took over the attack and at 15:45, the first shells rained down on W 13. Within less than 15 minutes, Typhoon aircraft joined the battle[77]. Immediately after this attack, B Troop advanced. The going was rough in the loose sand and despite casualties, B Troop with X Troop in support managed to capture the first bunkers. Slowly but surely, they managed to capture the German soldiers. Y Troop penetrated deeper into the emplacement. At the end of the day, some 70 Germans were taken prisoner. No. 48 RM Commando lost 7 dead and 80 injured around W 13. After the capture of W 13, the next stage, the advance on Zoutelande and Flushing could begin from here as well.
Notes
- Brooks, 2011, p. 25
- Brooks, 2011, p. 25
- De strijd om Walcheren/Wikipedia
- 4th Special Service Brigade/Wikipedia
- No. 10 (Inter-Allied) Commando/Wikipedia
- Operatie Infatuate – De Bevrijding van Walcheren/Korps Kommandotroepen
- 4th Special Service Brigade/Wikipedia
- Preparation for Operation Infatuate/Strijdbewijs
- Brooks, 2011, p. 37
- Rawson, 2020, p 37
- Brooks, 2011, p. 37
- Rawson, 2020, p 37
- Brooks, 2011, p. 37
- Brooks, 2011, p. 37
- Brooks, 2011, p. 41
- Brooks, 2011, p. 37
- Brooks, 2011, p. 41
- Brooks, 2011, p. 41
- Brooks, 2011, p. 41
- Brooks, 2011, p. 38
- Brooks, 2011, p 22
- Brooks, 2011, p 22
- Brooks, 2011, p 22
- Brooks, 2011, p 22
- Brooks, 2011, p 22
- Brooks, 2011, p 22
- Brooks, 2011, p 22
- Brooks, 2011, p 22
- Brooks, 2011, p 22
- Brooks, 2011, p 22
- Brooks, 2011, p 22
- Preparation for Operation Infatuate/Strijdbewijs
- Preparation for Operation Infatuate/Strijdbewijs
- Preparation for Operation Infatuate/Strijdbewijs
- Rawson, 2020, p 65
- Preparation for Operation Infatuate/Strijdbewijs
- Brooks, 2011, p. 39
- Rawson, 2020, p 65
- Rawson, 2020, p 65
- Rawson, 2020, p 65
- Brooks, 2011, p. 39
- Preparation for Operation Infatuate/Strijdbewijs
- Brooks, 2011, p. 39
- Preparation for Operation Infatuate/Strijdbewijs
- Preparation for Operation Infatuate/Strijdbewijs
- Preparation for Operation Infatuate/Strijdbewijs
- Preparation for Operation Infatuate/Strijdbewijs
- Rawson, 2020, p 65
- Rawson, 2020, p 65
- Preparation for Operation Infatuate/Strijdbewijs
- Rawson, 2020, p 67
- Preparation for Operation Infatuate/Strijdbewijs
- Preparation for Operation Infatuate/Strijdbewijs
- Preparation for Operation Infatuate/Strijdbewijs
- Rawson, 2020, p 68
- Preparation for Operation Infatuate/Strijdbewijs
- Rawson, 2020, p 68
- Brooks, 2011, p. 41
- Brooks, 2011, p. 42
- Rawson, 2020, p 68
- 4 Special Service Brigade/Strijdbewijs
- 4 Special Service Brigade/Strijdbewijs
- Rawson, 2020, p 68
- 4 Special Service Brigade/Strijdbewijs
- 4 Special Service Brigade/Strijdbewijs
- Rawson, 2020, p 68
- 4 Special Service Brigade/Strijdbewijs
- 4 Special Service Brigade/Strijdbewijs
- 4 Special Service Brigade/Strijdbewijs
- Brooks, 2011, p. 43
- Brooks, 2011, p. 50
- 4 Special Service Brigade/Strijdbewijs
- 4 Special Service Brigade/Strijdbewijs
- 4 Special Service Brigade/Strijdbewijs
- 4 Special Service Brigade/Strijdbewijs
- 4 Special Service Brigade/Strijdbewijs
- 4 Special Service Brigade/Strijdbewijs
Definitielijst
- Kriegsmarine
- Germa navy. Part of the Wehrmacht next to Heer and Luftwaffe.
- mortar
- Canon that is able to fire its grenades, in a very curved trajectory at short range.
- radar
- English abbreviation meaning: Radio Detection And Ranging. System to detect the presence, distance, speed and direction of an object, such as ships and airplanes, using electromagnetic waves.
- resistance
- Resistance against the enemy. Often also with armed resources.
- sniper
- Military sniper who can eliminate individual targets at long distances (up to about 800 meters).
- Squadron
- A military unit in the Belgian navy usually six to eight small ships operating together under one command. The smallest military unit in the Dutch air force of about 350 men. In most countries is the designation of a military unit thesize of a company. It is either an independent unit, such as a battery, or part of a bigger Calvary unit. In the air force it is the designation of a unit of aircrafts.
- Würzburg
- German short range radar. Was used to guide searchlights, FLAK and guiding German night fighters.
Information
- Article by:
- Wilco Vermeer
- Translated by:
- Arnold Palthe
- Published on:
- 07-07-2023
- Last edit on:
- 30-09-2024
- Feedback?
- Send it!
